Improvements on the 2nd generation pneumatic launcher are underway. This page is a work in progress documenting parts of the launcher as they are developed.
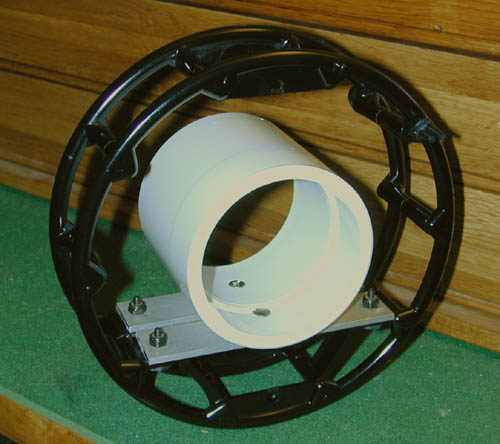
The idea behind using a bowfishing reel is to allow it to be coaxially mounted with the barrel, yielding maximum clearance for the line to swing around the reel as it spools off at high speed. It's also rugged, space-efficient, has a higher line storage capacity, and looks cool. The downside is that you have to reel in the line by manually winding it onto the reel.
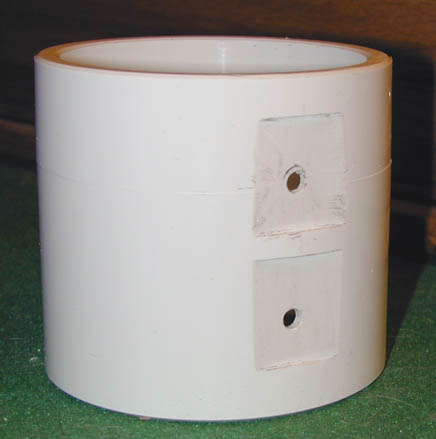
The reel is attached to a 2-1/2 inch PVC coupler sleeve. I cut the sleve down a bit in length and milled two inch-wide flats to accomodate the aluminum bar stock. The flats could also be cut by hand with a file, or epoxy could be used to build up the contact surface between the two. Any way you do it, the goal is to make a flat contact area between the two so that the forces generated by torquing the reel don't get concentrated at one point of the sleeve, possibly leading to failure of the plastic.
The two lengths of bar stock were bolted to the coupler, and the reel
bolted to the bars using hardware supplied with the reel. I think
the rubber washers are supposed to provide some give in case the line snags
on the reel. I'm doubtful it would provide enough shock absorbing
to prevent damage, but it couldn't hurt.

The hardware attaching the bars to the coupler are flat head machine screws, and a countersink is cut in the inside of the coupler for each screw head in order to recess it below the surface of the plastic. The coupler is simply friction mounted on the muzzle of the launcher, allowing it to be removed for reeling the line back in. Here is the reel mounted on the gen2 launcher.
Here is a close-up showing the path of the line (heavy orange line used here for clarity). The line end is jammed between two plastic fingers mounted on the forward face of the reel. When the ball is launched, it pulls the line out from between the fingers, after which it can spool freely off the reel.
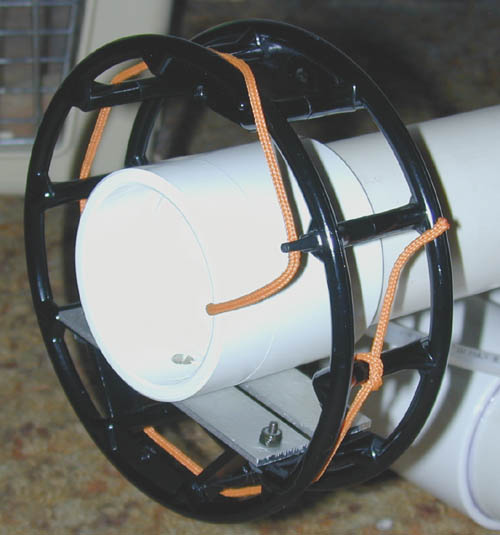
No tests have been done yet with the new reel, I'm waiting for more Spectra line to be delivered. Another nice thing about the Zip Reel is that it comes with 50ft of woven nylon line, which should be better leader material than the dacron that I've used up to now.
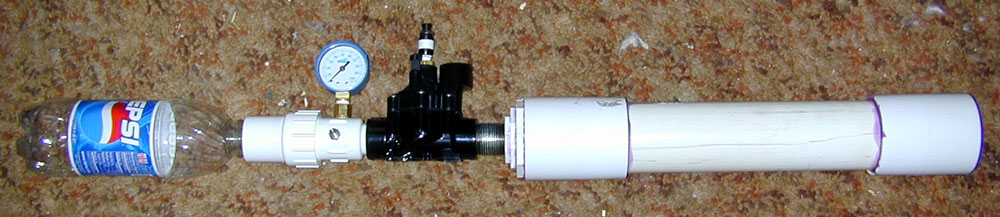
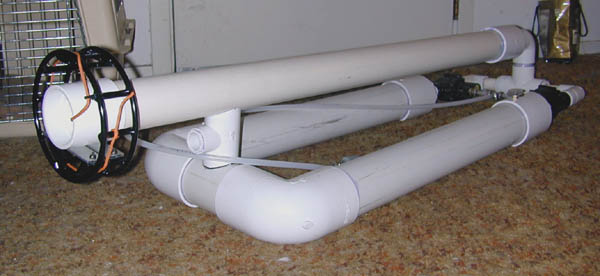
Emboldened by this success, I assembled the parts last weekend for a penultimate configuration, pictured below:
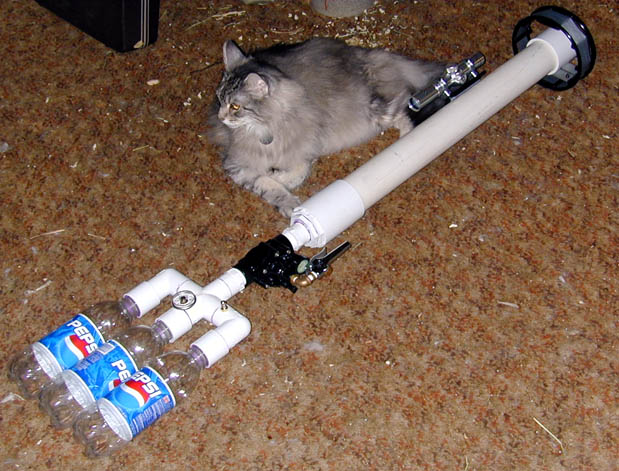
I'm calling this the "Trident" model, for obvious reasons. (Fuzzy cat not included in final launcher.) Right now the barrel is only friction fitted into the sleve for testing purposes. I still haven't decided what the final barrel length will be, this one is cut on the long side on the theory that you can always make it shorter. I wasn't able to do any performance tests last weekend because the glue hadn't set, but I've pressurized the air storage to 10psi to look for leaks and it appears good to go. The scope is a Tasco 2X handgun scope that I wasn't using for anything else. I'll need to bore-sight it to see if I aligned the mount well enough to work. I probably won't have a chance to do field testing until next weekend.
The bottle joints are made from 1" to 1-1/2" slip-spigot PVC adapters. After gluing one to a 2 inch lengths of 1-inch PVC tubing, I turn the inside of the 1-1/2" end on my mini-lathe so that the bottom is flat, and then enlarged the inside diameter to the OD of 1-1/4" tubing. Then I cut 8 TPI internal threads into a section of 1-1/4" PVC, and cut rings off this section .360" wide. A rubber washer sits on the flat bottom of the adapter, and the threaded ring is seated down on top of this washer and glued in place. When the pop bottle is screwed into the ring, the rubber washer is squeezed between the mouth of the bottle and the adapter bottom, creating an air-tight seal. It's a complicated system made necessary by the fact that the threads on the bottle are deliberately designed to be useless for sealing the opening. I'll have more detailed pictures of the setup soon.
I also did one test launch straight up using the Zip Reel where the reel performed perfectly. I only made one launch since the nearest open area available was the play yard of the middle school across the street, and carrying bazooka-looking implements onto school grounds can bring you unwanted attention.
I ended up having to glue the barrel into the 2-1/2" sleeve coupler
because, at higher pressures and with repeated firings, the barrel would
blow out of the coupler. Since this meant that the launcher would
have to break down at the threaded exhaust fitting of the valve, the transportation
length would be longer. Since shorter barrels didn't seem to degrade
performance much, I cut 5" off of the longer barrel for a final length
of 22". With the 4oz ball, 2-shot average velocities recorded were:
| pressure (psi) | velocity (fps) |
| 20 | 55.6 |
| 25 | 80.6 |
| 30 | 99.5 |
| 35 | 111.2 |
| 40 | 129.9 |
| 45 | 142.3 |
| 50 | 154.4 |
The second generation launcher had a much greater range, but we only used a fraction of it for launching antennas. The Trident seems to cover the needed range of velocities very well, and it weighs a third of the double-valved gen2.
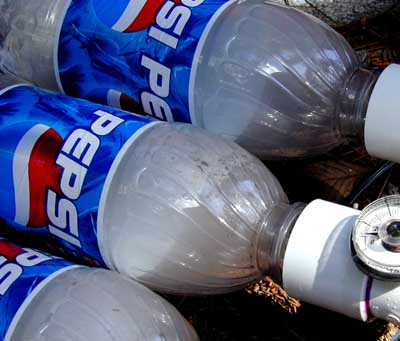
It's interesting to see through the transparent pressure cylinders how the water vapor from the compressed air condenses after each shot. Below is a picture just after firing at 30psi. The water may build up after repeated firings to the point where it runs off in drops, but, since all the parts of the launcher are made for water plumbing use, that shouldn't cause a problem.
So far, there have been no signs of the bottles bulging or other indications of their being unable to handle the required pressure, even when tested up to 90psi, but I still wear safety glasses when operating the Trident. They are also relatively fragile and care should be taken that they are not crushed or dented. Fortunately, if I even suspect a bottle has been damaged, a spare can be screwed in its place in less than a minute.
